Let me ask you this. Do you want to have big and strong biceps? Yes, of course; who does not want big and strong biceps? Biceps are the no.1 muscles that help the “show off” factor. And most love this. Wait, you don’t have access to a gym or don’t want to pay for a gym.
We often receive this question: How to get bigger biceps at home?. In trying to answer this question, we relaized that what everyone wanted to know is how to get bigger biceps at home without equipment.
No worries, you still can grow your biceps at home with no equipment by using your body weight or, at best, using some household items.
Let’s dive in!
Oh, wait a minute. Before you jump right into doing these body weight exercises, it is beneficial to know a few things. So apart from recommending differnt type of body weight exercise and a workout plan, we present the following information for your benefit.
- A bit about biceps anatomy. There is no science class here; however, this helps you understand why you need to do the exercises.
- Techniques and tips for maximizing your at-home bicep workouts
- Building supporting muscles
- A few other important things
Introduction to At-Home Bicep Workouts

People often think that the only way to gain big biceps is to lift weights, but that’s not the case. You can still build your biceps without weights, using your body weight alone.
Body weight exercises can be as effective as weight-lifting exercises when building bigger biceps. Not only they are effective, but they’re also convenient and don’t require any equipment.
Biceps for show, triceps for go.
Adam Peaty
Benefits of Building Bigger Biceps with Bodyweight Exercises
There are several benefits to building bigger biceps with bodyweight exercises:
- Convenience: A body weight exercise does not require equipment so you can do them anywhere, anytime.
- Cost: Since you don’t need equipment, bodyweight exercises are much cheaper than weight lifting.
- Variety: There are many bodyweight exercises you can do for your biceps. This variety means you can mix up your workouts and keep them interesting.
- Safety: Since you’re not using weights, you don’t have to worry about injuring or straining your muscles. Of course, you still need to use common sense to avoid injuries.
- Mobility: With bodyweight exercises, you can target all of your biceps muscles, giving you a more balanced workout.
Overall, bodyweight biceps exercises are a great way to build bigger biceps in the comfort of your home. At Fitbodii, we talk and promote working out at home.
Bicep Anatomy and Muscles
Before we look at different types of bicep bodyweight exercises, let’s take a quick look at the anatomy of the biceps.
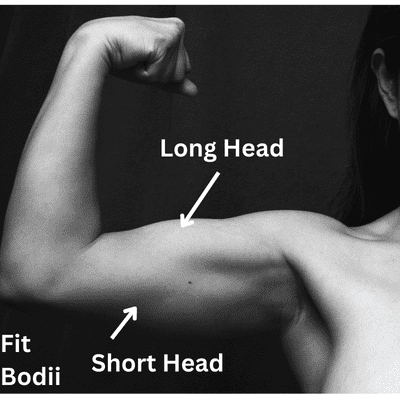
The biceps are made up of two muscles- the long head and the short head. The long head is on the outside, while the short head is on the inside.
The long head of the bicep is responsible for flexing the arm, while the short head is responsible for the supination or rotation of the forearm.
When doing bodyweight biceps muscle exercises, you should focus on targeting both the long and short head for a balanced workout.
Best No-Equipment Body Weight Exercises For Bigger Biceps At Home
There are many different types of bicep bodyweight exercises you can do without weights. Here we recommend some of the best bodyweight workouts for the biceps muscles.
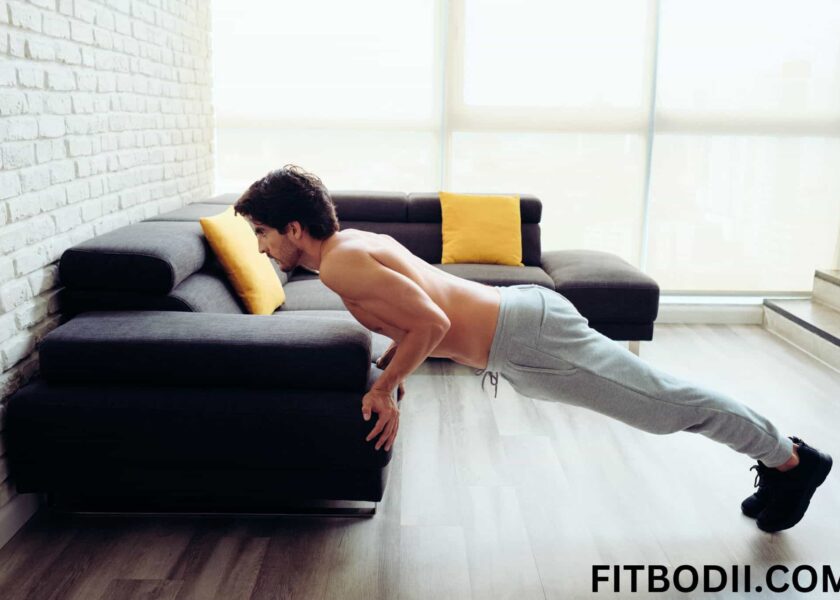
Before you jump into targeting bicep muscles, we must recommend push-ups. To gain a fit body at home, especially for beginners, doing push-ups can be a great way to build core strength and upper body muscles. Push-ups, such as your core, chest, deltoids, arms and shoulders, target many muscle groups.
Standard Push-up:
Follow the steps below to do a standard push-up:

- Get on the floor mat on all fours. Keep your hands on the floor wider than the shoulders. Balance yourself on your hands and toes and feet separated at hip-width.
- Inhale and slowly bend your elbows and lower your body to the floor. Stop as your elbows are at about a 90-degree angle.
- Exhale and push your body upwards using your arms, returning to the start position. This would be one rep (repetition).
Tips for a standard push-up:
- Try to keep your core tight through the entire push-up.
- Keep your body from head to toe in a straight line. Do not arch your back muscles
Video for a standard Push-Up:

One Arm Push-Up
One arm push-up is a slightly advanced exercise compared to a standard push-up. You could attempt this one at home after doing push-ups for a few days, depending on how strong your arms are.
If you are a beginner, do not be in a hurry to perform this exercise.
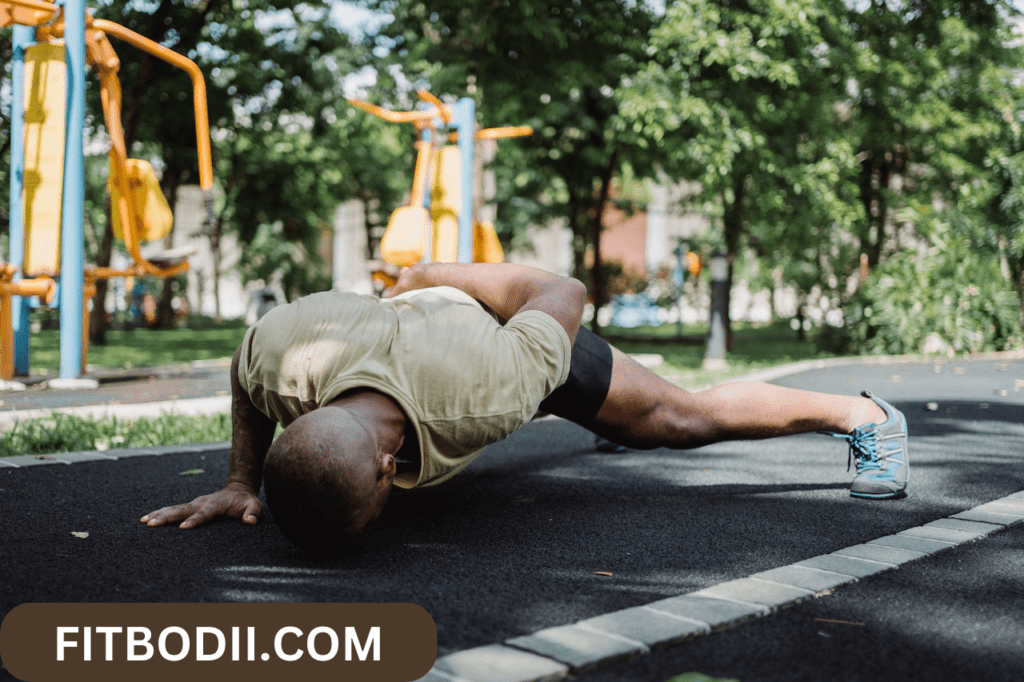
Follow the steps below to do a One Arm push-up:
- Get in the same starting position as a standard push-up.
- Once you feel balanced on your hands and toes, bring your left hand up and onto your back. At this point, you might lose the balance a bit and adjust your body slightly to re-balance
- Now perform a push-up as you would perform a standard push-up, but only with your right arm doing the work.
- Bring your left hand to the original position on the floor and move your right hand to your back.
- Perform another push-up as you would perform a standard push up but only with your left arm doing the work
- Bring your right hand back with your palm on the floor.
- This would be one rep.
Tips for one-arm push-up:
- If you cannot balance yourself on any one arm, do not push through, as this means that one arm cannot hold your weight
- Also, remember that form is very important and doing exercises in bad form could cause injuries.
Video for a standard Push-Up:

Diamond Push-Up
While single-arm push-ups are a step up from standard push-ups, diamond push-ups are more advanced than standard push-ups. So, start slowly and always listen to your body while performing any advanced exercise, such as this one.

Follow the steps below to do a diamond push-ups:
- While getting into a standard push-up position, keep your hands together under your chest instead of at slightly more than shoulder-width. Make a diamond shape with your index fingers and thumbs.
- Lower your chest towards the floor and bring it close to the floor without flaring out your elbows to the sides. Remember to keep your back flat.
- Elevate your body away from the floor by pushing your arms against the floor. Do not lock in your elbows.
- Return to the starting position. This is one rep.
Tips for a diamond push-up:
- If you have any pre-existing issues with your elbows, you need to be careful. The narrower grip, increased weight on your elbows and range of motion could aggravate the condition. You could help yourself by widening the grip (but not as much as a standard push-up)
Video for a diamond Push-Up:

Inside Reverse Hand Push-Up
There are a few reverse push-ups; one popular one is inside reverse-hand push-ups.
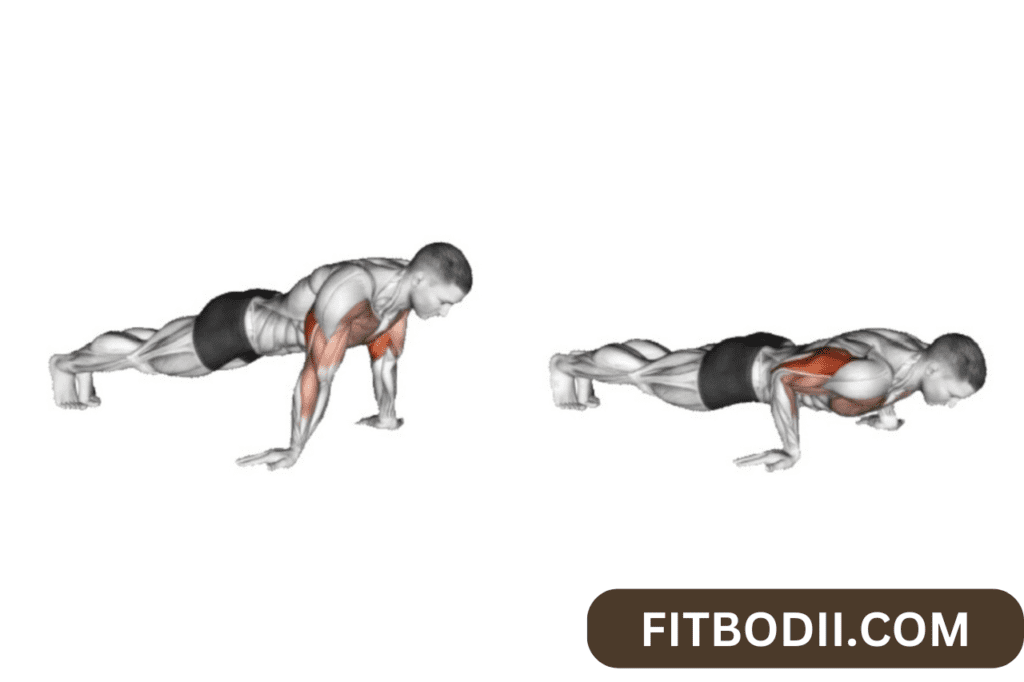
While this does not direct the biceps directly, it helps indirectly. This exercise helps strengthen the triceps and boost upper-body conditioning.
Follow the steps below to do an inside reverse hand push-up:
- Sit on the floor with your knees bent and your hands on the floor underneath your shoulders. As opposed to standard push up, for inside reverse push up, you will turn palms facing backward. The fingers will be pointing toward your legs.
- Using your hands, push against the floor and bring your upper body. This action would make your upper body and arms straight.
- Push your body upward using your hips, and straighten your legs. At this point, your body should be supported only by your hands and heels. Safety point; it is okay if you cannot push your body all the way. Especially if you are a beginner, listen to your body.
- Then, slowly bring your body towards the floor..
- That would be one rep.
Tips for inside reverse hand push-up:
- The right form is very important for this exercise b. Engage your upper arms c. Do not raise your hips too high or sag them too low d. Engage your core and glutes
Chin-Up
A chin-up is a body weight training workout. This exercise primarily targets the latissimus dorsi muscles in the upper back and the arms’ biceps muscles. It’s very similar to a pull-up, except for your hand position: in a chin-up, the palms will face the body, while pull-ups are performed with the palms facing away. The chin-up is notoriously difficult, but it’s certainly possible to master with training and effort.
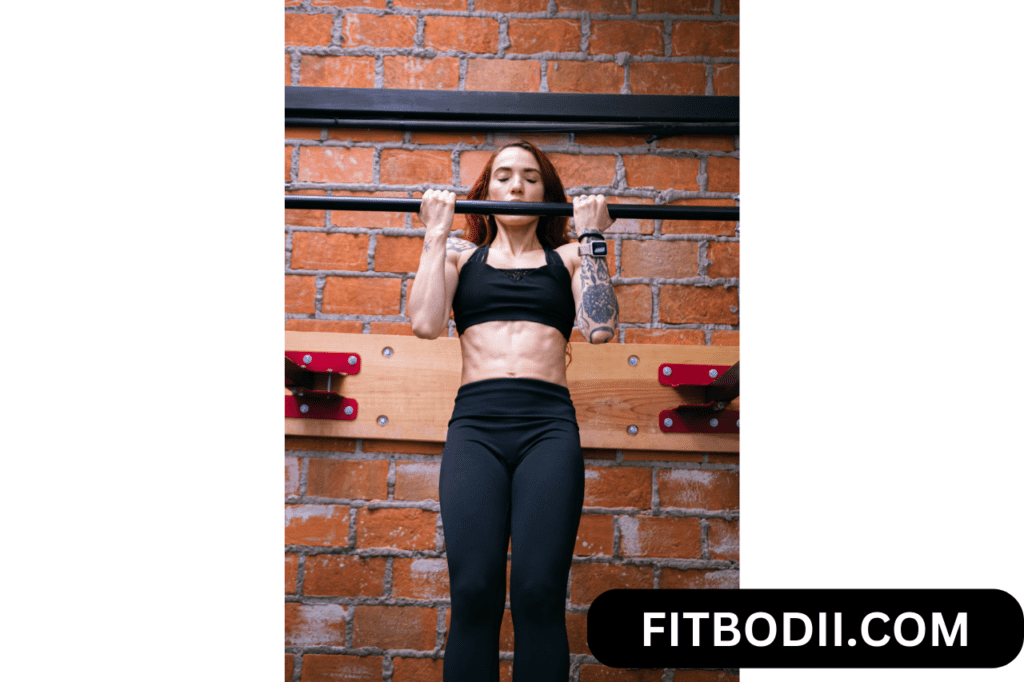
Chin-up exercise targets the dorsi- muscles in the upper back and the biceps.
Chin-ups are difficult, especially if you have just started doing them. So, do not lose hope; you can become good at chin-ups with some training and effort.
For this exercise, even though we want to recommend no-equipment exercises, a chin-up would need at least a chin-up bar. Once you acquire such a bar, you need to place it in a tall doorway in your house. It has to be taller than your shoulder height. Also, ensure the doorway is stronger to some extent to prevent any accidents. At all times, be aware of your surroundings.
Follow the steps below for a chin-up:
- Grip the bar comfortably but firmly by putting your hands on the bar with the palms facing your body. Your hands should be spaced at shoulder-width distance.
- Using your upper arm strength, lift your body towards the bar. You can stop as soon as your chin is above the bar. You will have your elbows fully bent. You can also bend your knees or cross the feet to distribute weight evenly.
- Slowly, in a controlled motion, lower your body until your arms become straight.
- All these steps together are one repetition.
Tips for chin-ups:
- Don’t do half reps. An effective chin-up needs a full range of motion. b. Employ your shoulder blades and control your core.
Inverted Row
We at fitbodii are big fans of compound exercises. Compound exercises target many different muscle groups in your body. An inverted row works all of your pull muscles, such as:
- Back muscles
- Biceps
- Forearms
- and many of the stabilizer muscles
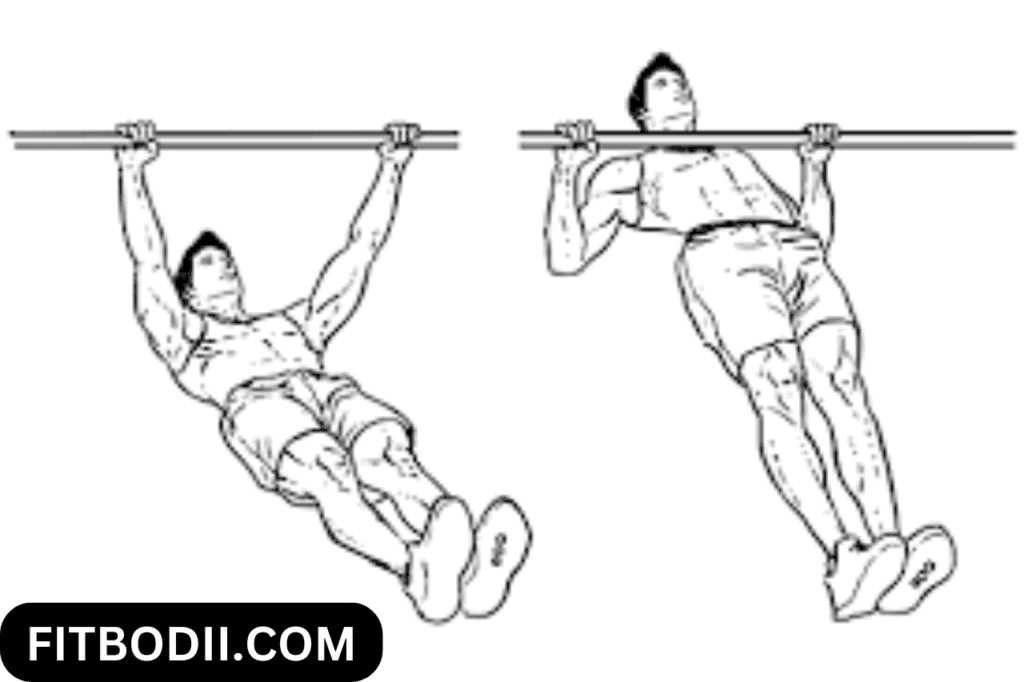
Follow the steps below for an inverted row:
- Set the bar at around waist height. You can get creative and use the same chin-up bar across two stools or any other set-up that would be sturdy enough. Note that for easy exercise, keep the bar height high, and for difficult levels, keep the bar lower height.
- Lie under the bar face up and make sure the bar is set just far above where you can reach from the floor
- Grip the bar with your hands firmly. This must be an overhand grip, i.e. the palms face towards your legs. And the hands should be separated slightly more than shoulder-width
- Keeping all body parts (shoulders, hips, legs, and feet) in a straight line also tightens your abdominal muscles and butt.
- Slowly pull yourself towards the bar until the chest touches the bar
- Then slowly lower your body back down to the starting position. Keep the proper form.
- This would be one repetition.
Tips for an inverted row:
- Pulling straight up, bring your hands to your chest.
- Controlling your descent, keep your body and core tight.
Pull-Up
Pull-up is very similar to a chin-up, with the difference in how you grip the bar. You will grip the bar in a pull-up with your palms facing away. Pull-ups are an excellent body weight workout that would help gain huge upper-body strength.
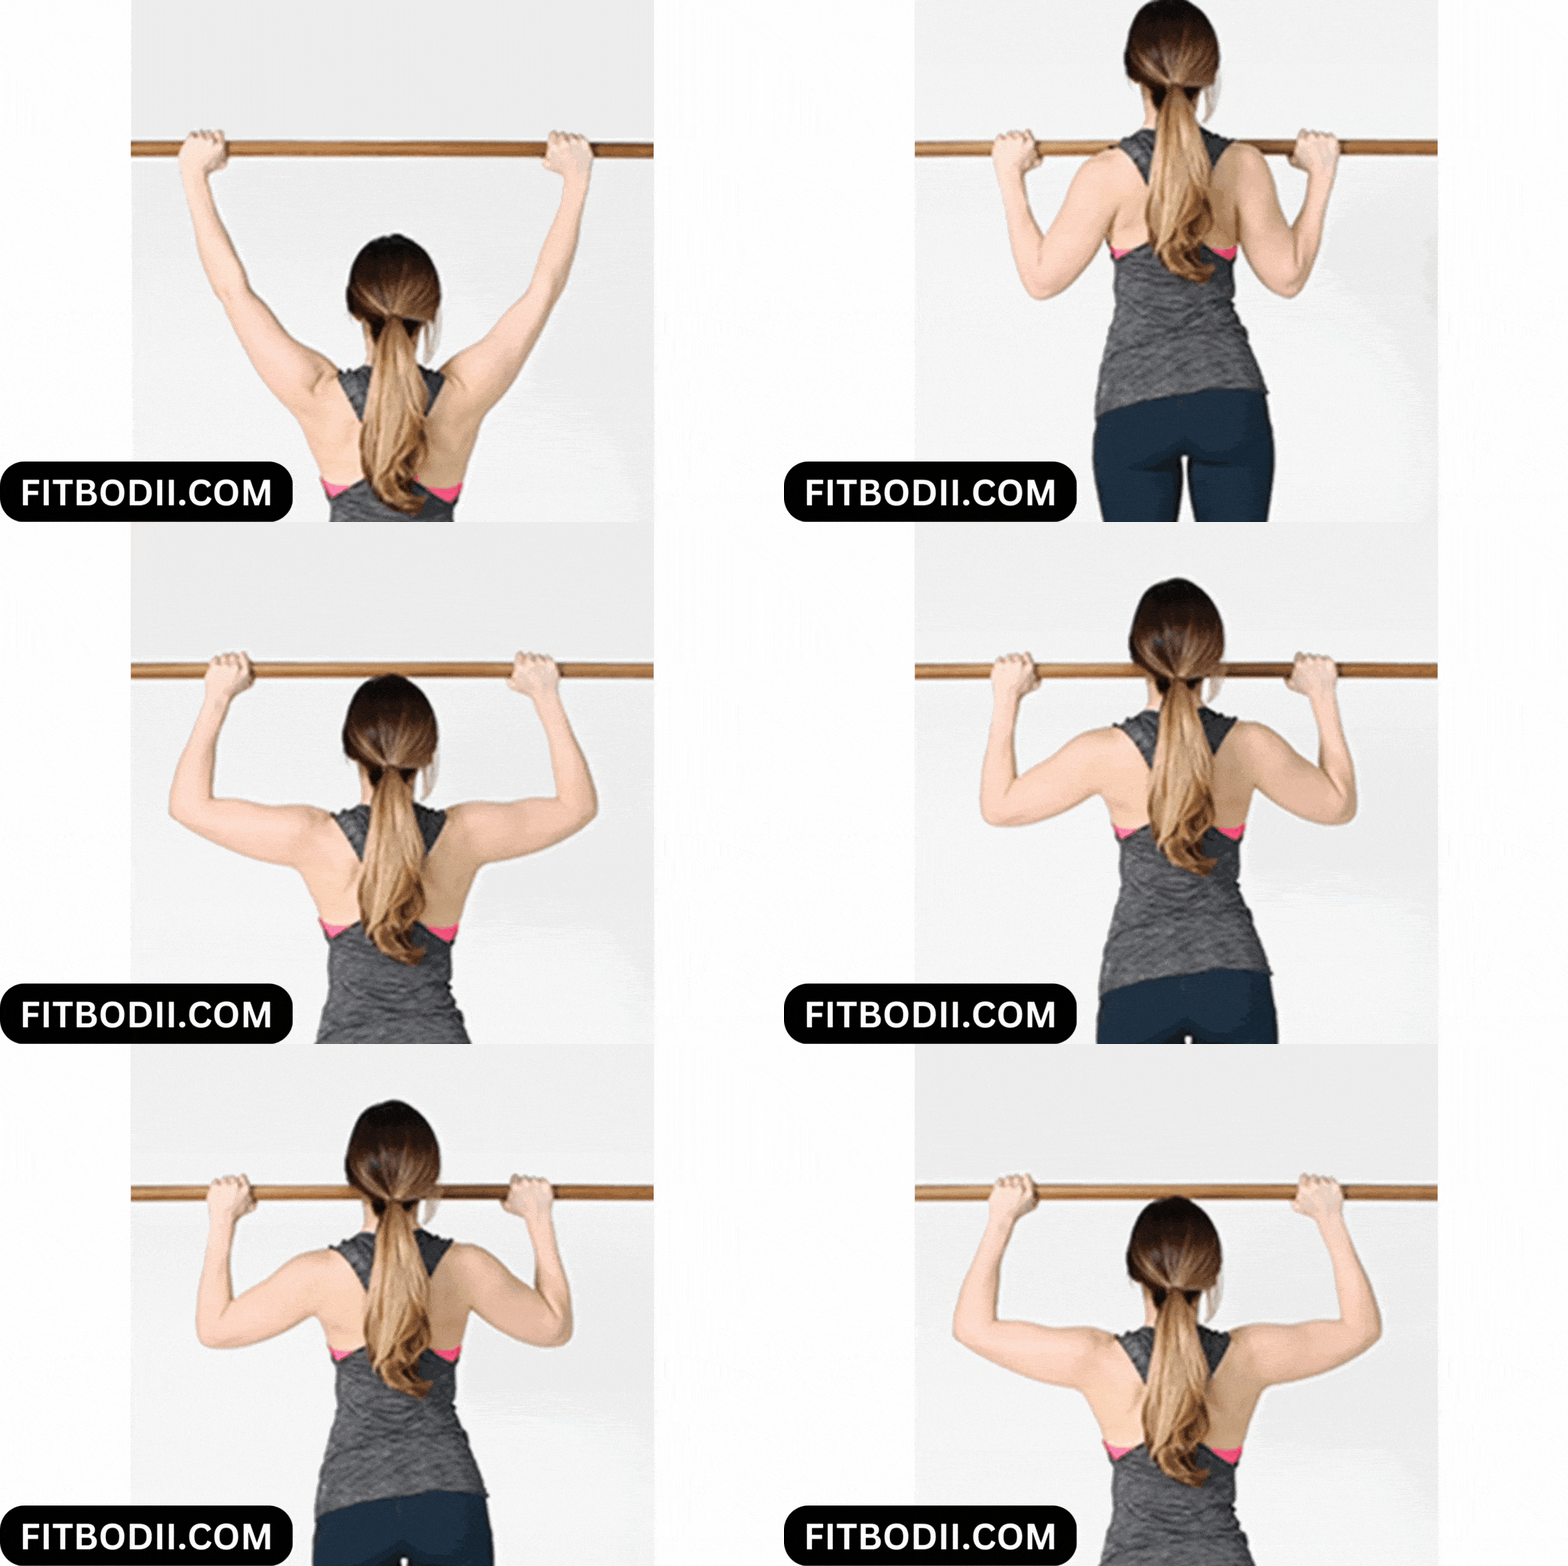
Follow the steps below for a pull-up:
- Set up the bar how you set up for a chin-up. You could use a bar and set it up at a height in a doorway in your house. However, please ensure the bar and doorway can hold your weight. Otherwise, there is a good chance of injury or accident.
- Hold the bar with an overhand grip (palms facing away from your body). Your hands should be slightly further than shoulder-width distance. This is your starting position.
- Engaging muscles in your arms and back, elevate your upper body towards the bar until your chest reaches the bar’s level.
- Once at the top, slowly lower your body down to the starting position.
- This would be one repetition.
Tips for a pull-up:
- Your entire movement should be deliberate, i.e. slow and controlled. If you are not able to do it in a proper form, take some rest. b. Do not grip the bar too wide, as it will prevent a full range of motion. c. Your wrists should remain neutral; thumbs and fingers should be on the same side. d. Keep your elbows close to your body.
Planks
A plank is a compound exercise that engages multiple muscle groups at the same time: the core, upper body, and lower body.
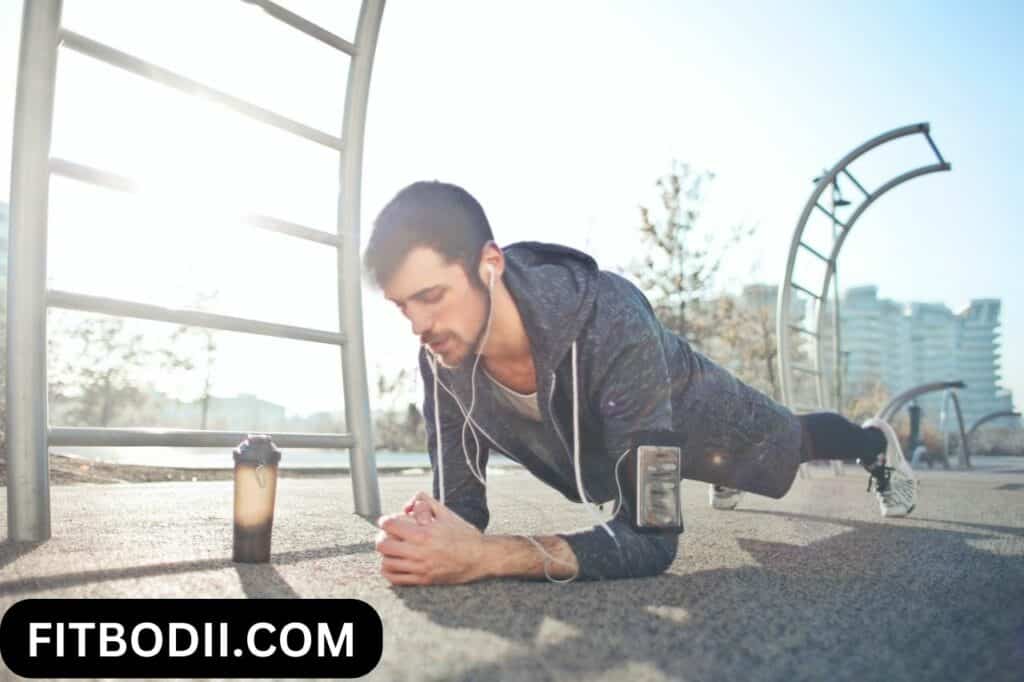
Plank is the best exercise when you want to engage and target multiple muscle groups, such as the core, upper body and lower body.
There are variations of standard plank that would target the biceps more effectively.
These variations are Side Plank, Plank Shoulder Tap, and Up-Down Plank.
Side Plank
The side plan targets muscles on one side of your body at a time. These muscle groups include the biceps, triceps, shoulders and oblique muscles.
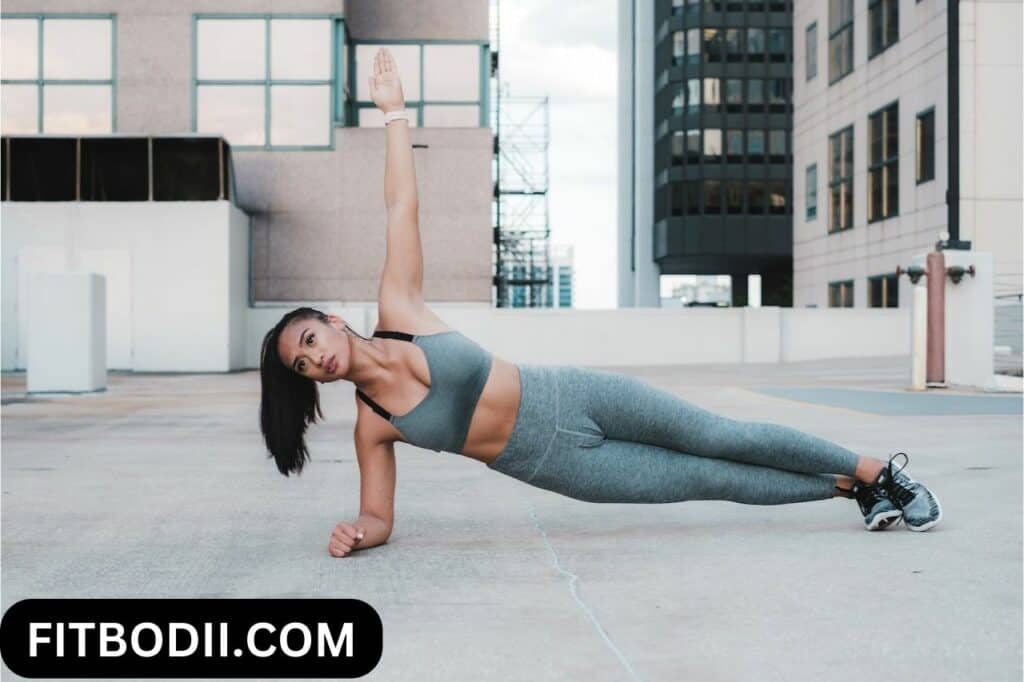
Follow the steps below for a side plank:
- Get set in standard plank position. That is like a push-up position with hands bent at elbows; your weight will balance between your forearms and toes.
- While gradually turning your body to one side, lift one arm to point towards the ceiling. Ensure your body is in a straight line from head to toe.
- Now, slowly bring the arm back to the plank position and do the same on the other side
- Bring the other arm to the ground and return to a plank position.
- This would be one repetition.
Tips for a side plank:
- Avoid this exercise if you have shoulder, arm or core pain.
Keep your core tight and hold your body in a straight line from head to toe. Don’t let your body sag.
Shoulder Tap Plank
This variation of plank work your shoulders, biceps, core, hamstrings, and deltoid.
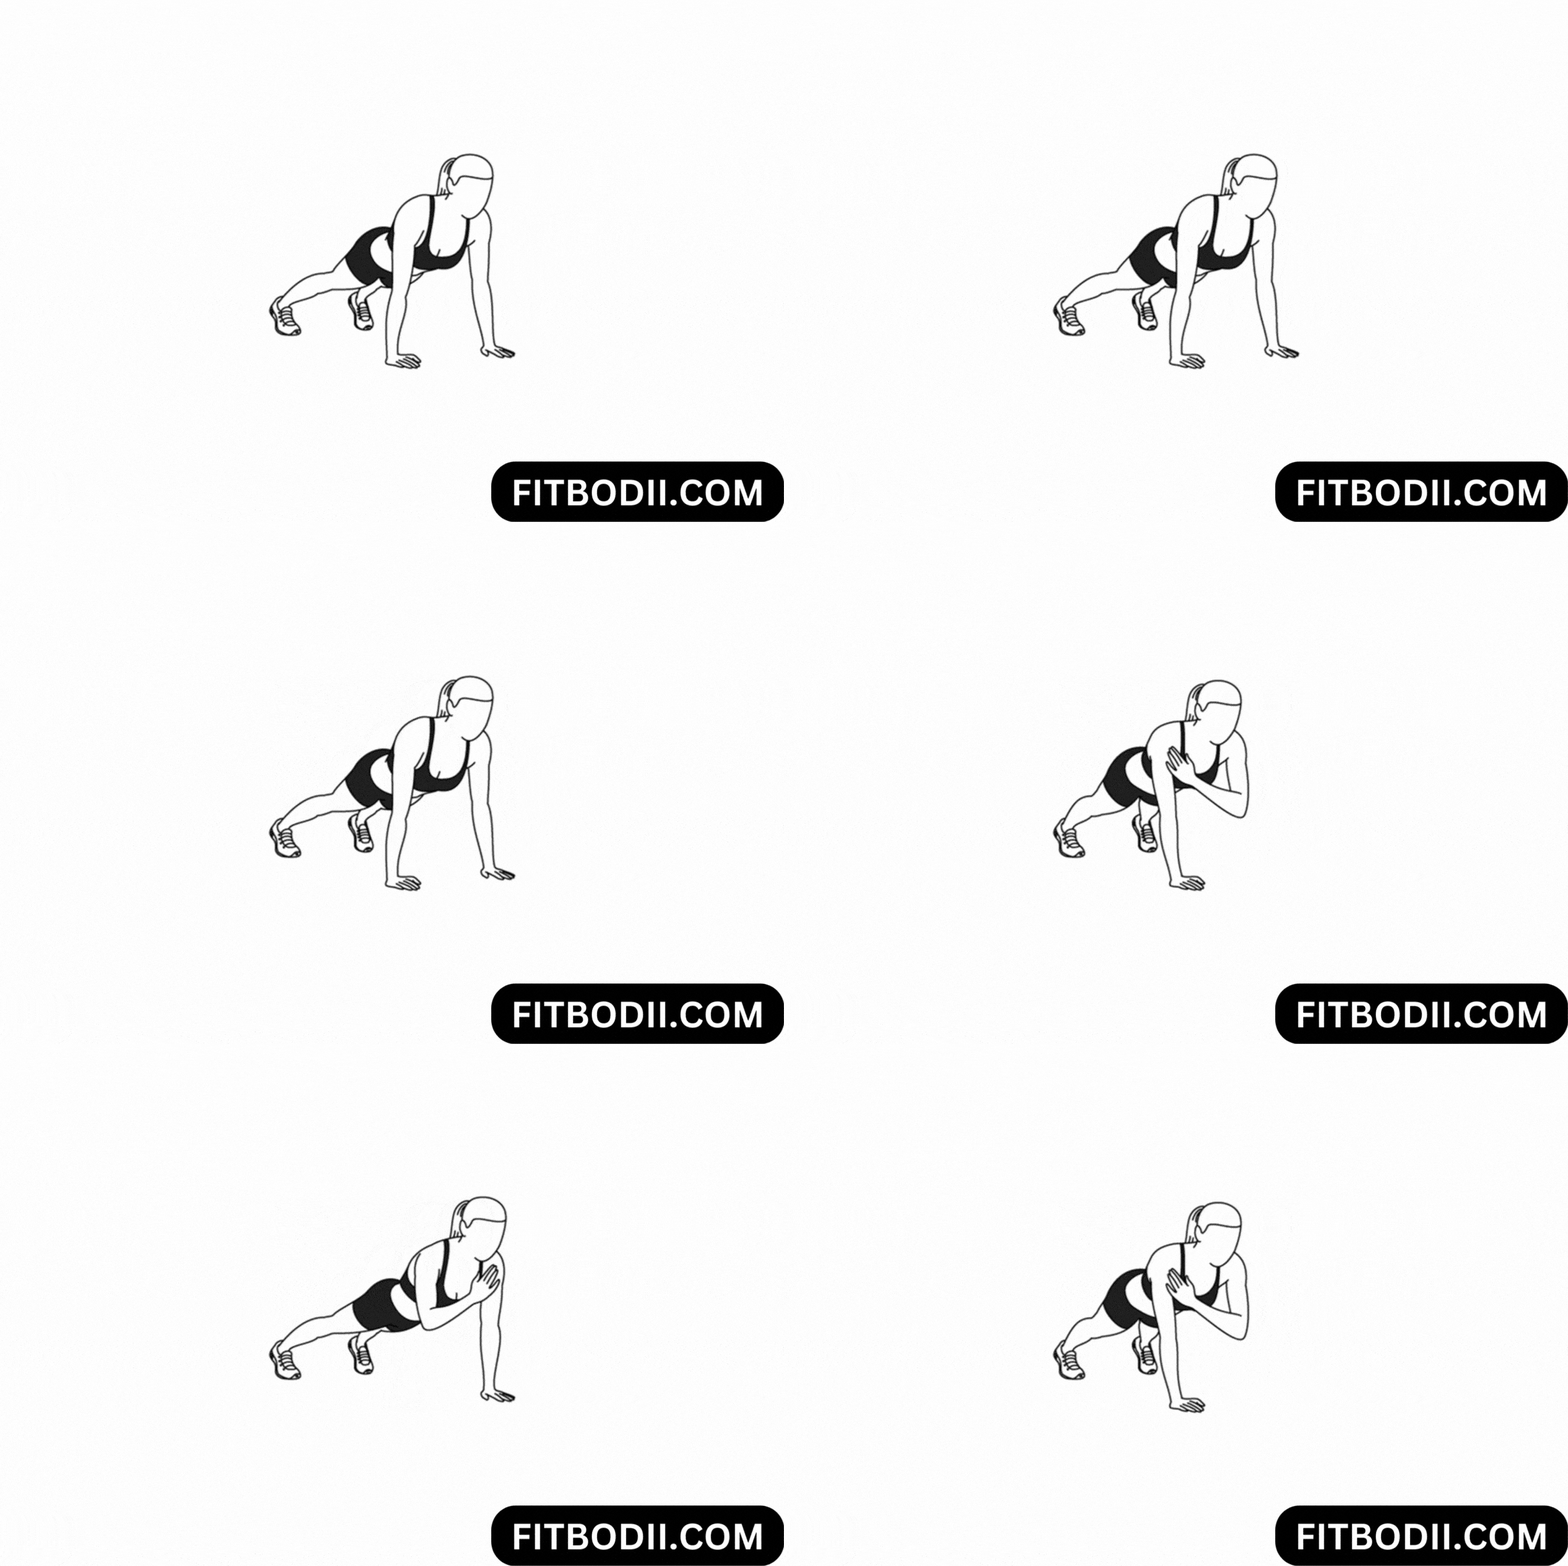
Follow the steps below for a shoulder tap plank:
- Begin in a standard push-up position with straight arms.
- For this exercise, keep your feet apart slightly more than hip-width
- Lift one hand from the ground and touch your opposite shoulder. Then bring the hand down.
- Do the same movement with the other side and repeat.
- This would be one rep.
Up-Down Plank
This variation targets the biceps and shoulders.
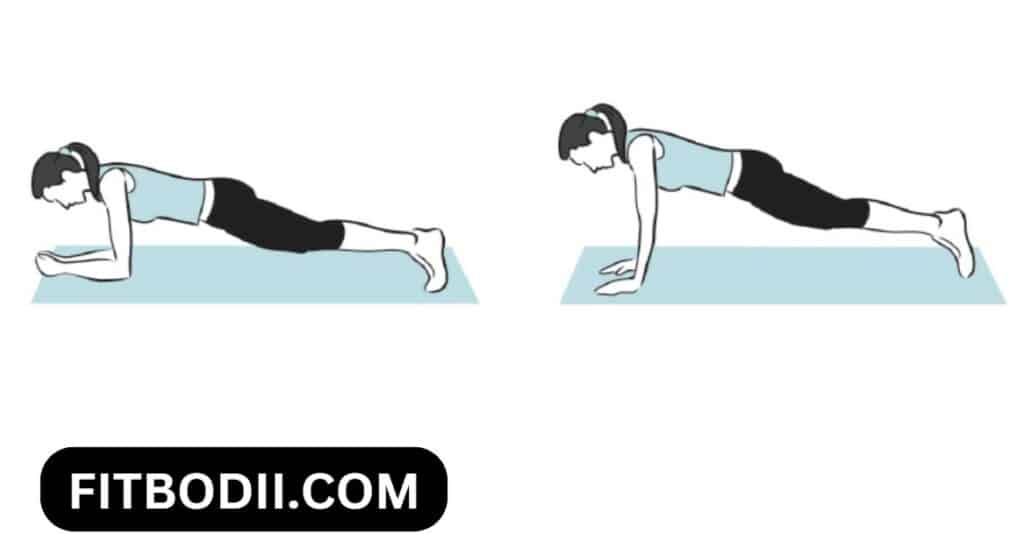
Follow the steps below for up-down plank:
- Get in a lower plank position with weight on your forearms and balance between your forearms and toes.
- Then make one arm straight and keep the palm on the floor.
- Then bring the other arm straight. This would bring you into a push-up position.
- Lower one arm into a plank position. Then the other arm down, now back to a lower plank position.
- This would look like you are continuously changing from the lower plank position to the push-up position and back into the lower plank position.
- This would be one rep.
Biceps Workouts With Resistance Band
We only wanted to recommend body weight exercises; however, you might want to consider using resistance bands for bigger biceps. Resistance bands are very effective due to their variable tension.
When we are often asked, what the best exercise for bigger biceps would be, the resounding answer is Biceps Curl. Nothing beats a curl exercise when it comes to growing bigger biceps.
Although resistance bands are not traditional gym equipment (iron), we shall talk about resistance and muscle overload. At the gym or at home, when you try to lift some thing heavy, the resistance is directly proportional to the weight. The more the weight, the higher the resistance.
So, if you choose higher restistance bands, it will provide more weight-like difficulty for the following exercises.
There are two other important things to consider when you work with either resistance bands or weights. And they are related things to know.
Muscle overload: When you gradually increase the wight, or repetitions, it is called progressive overloading. Muscle overload is extremely important if you want to gain muscle strength. Your musculoskeletal system can only get stronger only if you progressively overload your muscles.
Time Under Tension: This term means the amount of time any muscle group is held under tension during a set. For example, when you are performing a push up, when you bend your arms and bring your chest close to the floor, you are putting a few of the muscle groups under tension. The amount of time that you keep your position is TUT.
Similar to the need to have progressive overload (of the resistance or weight), it is important to progressively increase the time under tension for building stronger muscles.
Standing Biceps Curl
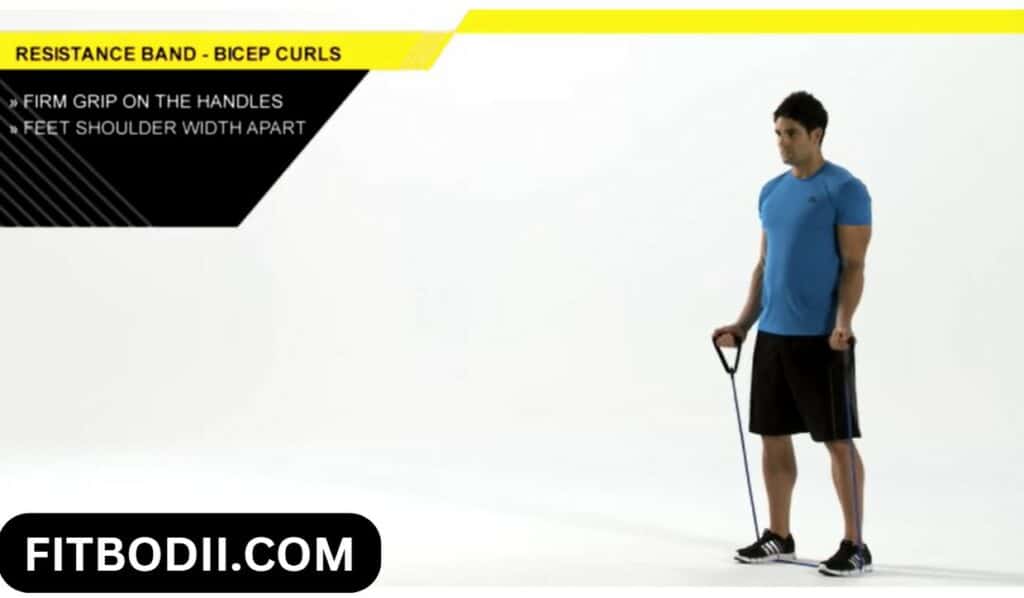
Follow the below steps to perform a standing biceps curl:
- Standing straight, keep the resistance bank underneath your feet. Feet should be at shoulder-width apart.
- Holding the resistance band in your hands, start pulling the band upwards. Keep your back straight and chest up.
- Lift the handles until your hands reach the top of your chest
- Lower hands to your hip level
- This will be one rep.
Video for Standing Biceps Curl:

Seated Biceps Curl
A seated biceps curl would be the same as a standing biceps curl except for the following things:
- You will be sitting instead of standing.
- You will keep the resistance band under your hips instead of your feet.
Beginner Bicep Workout At Home
We recommend following workout plan to acheive bigger biceps at home. Three workouts provided with three bicep exercises at least.
Using your workout schedule, plan for each workout on alternative days with rotating the workouts beween workout 1, 2, and 3. Generally, it is recommended that you take a rest day between each workout day.
Workout 1
| Workout | Reps | Sets | Rest |
| One Arm Push up | 10 | 3 | 30 seconds |
| Side Plank | 10 | 3 | 30 seconds |
| Diamond Push up | 10 | 3 | 30 seconds |
| Standing Bicep Curl with reistance band | 5 | 4 | 30 seconds |
Workout 2
| Workout | Reps | Set | Rest |
| Plank shoulder tap | 12 | 3 | 40 seconds |
| Inside Reverse Hand Push up | 12 | 3 | 40 seconds |
| Diamond Push up | 12 | 3 | 40 seconds |
| Seated Bicep Curl with resistance band | 5 | 4 | 30 seconds |
Workout 3
| Workout | Reps | Sets | Rest |
| Standing Biceps Curl with resistance band | 10 | 3 | 30 seconds |
| Inverted Rows | 10 | 3 | 30 seconds |
| Seated Biceps Curl with resistance band | 10 | 3 | 30 seconds |
Techniques & Tips for Maximizing Your At-Home Bicep Workouts
Here, we discuss the techniques and tips. Following these techniques and tips help you not only maximize the results but also will ensure safety and injury free training sessions.
Techniques
Don’t train every day
Overtraining is a real thing. Although the chances of overtraining are minimal, especially as a beginner, you need to be aware of the consequences of overtraining.
One might think that working out every day will yield bigger biceps. But that is far from the truth. Any muscle group gets stronger only during the rest periods during recovery. Train your biceps only twice a week for the best results.
Limit the length of your sessions.
Keep your biceps training sessions to 15 to 30 minutes maximum. Beyond that, the probability of ill-form and injury becomes high.
Always give your best in training.
While we do not want you to overtrain or train for too long in a session, we ask you to give your best when you train.
Don’t be lazy and push yourself a bit. Don’t push yourself so much that an injury will happen. However, push yourself daily to achieve more than you did yesterday.
Tips to help gain muscle growth in your biceps
Some tips for getting the most out of your at-home bicep workouts:
- Make sure to warm up: Warming up is an important part of any workout. Make sure to do light stretching before your bicep exercises to prevent injury.
- Focus on form: Proper form is key for maximizing the effectiveness of your bicep exercises. Make sure to focus on proper form and technique to get the most out of your workout.
- Increase the intensity: To make your bicep workouts more challenging, try increasing the intensity. You can do this by decreasing the rest between sets or increasing the number of reps.
- Change up your exercises: To keep your workouts from getting stale, try changing up your bicep exercises. This will help keep your workouts interesting and help you progress.
- Workout schedule: Create a schedule for your workouts and stick to it. Many fit people attribute their success to having a workout schedule.
Supplements for Building Stronger Biceps
In addition to body weight bicep muscle exercises, there are several supplements you can take to help you build stronger biceps. Our recommended supplements for biceps:
- Creatine: Creatine is one of the most well known and effective supplements. It helps with rapid increase in performance during intense activity. It helps increasing the energy. Taking creatine is known to help gain muscle strength.
- Whey protein: Whey protein is a great supplement for building muscle. It helps to increase muscle protein synthesis, which can help you build bigger and stronger biceps.
- Branched-chain amino acids (BCAAs): BCAAs are essential amino acids to increase muscle growth and recovery. Taking BCAAs can help you in your goal to get huge arms.
Wrapup on How to Get Bigger Biceps
Building bigger biceps doesn’t have to be complicated. With own bodyweight exercises, you can build bigger biceps in the comfort of your home.
So if you want to build bigger biceps without weights, give bodyweight exercises a try!
Below, we answer some of the most frequently asked questions about getting bigger biceps at home. If you have further questions or need more clarity on exercises, do not hesitate to contact us through our get in touch page. We will be happy to answer.
Frequently Asked Questions on how to get bigger biceps at home
What is the fastest way to get big biceps?
This is a difficult question, as there is no one-size-fits-all approach. However, one of the most common method people use to build bigger biceps include weight training or own body weight exercises. In weight training exercices, you will use heavy weights to build muscular strength (or bicep strength using biceps exercices). In body weight exercises, you will use your own body weight to put resistance on your muscles.
Both workouts are effective in increasing arm size and tone, but you will need to invest time into exercising if you want results fast. However, concentraing only on bicep muscles and neglecting other upper body muscle groups (such as chest mucles, triceps, lower and upper back) could result in incorrect postures and injuries.
Additionally, ensure not to neglect your shoulder joints when doing big biceps exercises; they play an important role in shoulder movement and arm growth. So be sure to exercise both your arms and shoulders regularly!
How can I increase my bicep size at home?
Bicep curls are a great way to increase your biceps size at home. To do this, you’ll need some dumbbells and proper form.
Alternatively, if you are working out at home, you could use home made weights (a bucket filled with sand could be a great option).
Begin by standing with feet shoulder-width apart and press the weights evenly down towards your thighs using an overhand grip. Brace your abs as you curl the weights up towards your shoulders, ensuring they stay in line with each other throughout the move. Slowly lower them back to starting position and repeat for the desired reps. Remember to keep tension on the muscles while performing these exercises so that they don’t fatigue quickly and result in poor form or torture injuries!
How do you get big biceps in 2 days?
There is no single method that works for everyone, but there are a few approaches that may help you achieve big biceps in a short time. The first approach would be to use an exercise program designed to build big muscles. This could include exercises such as crunches, bench presses, and squats. To maximize the effectiveness of these exercises, it is recommended that you perform them with good form and ensure that you’re using proper weightlifting equipment.
If working out at home isn’t your thing, you can try “bicep curls.” This involves performing heavy dumbbell curls while standing or seated on an incline bench with your palms facing forward. Keep your elbows bent and maintain good technique, so the tension remains on the biceps throughout the entire movement sequence. Lastly, if all else fails (and trust me – it will), take supplements like Creatine or Nitric oxide to help build muscle faster!
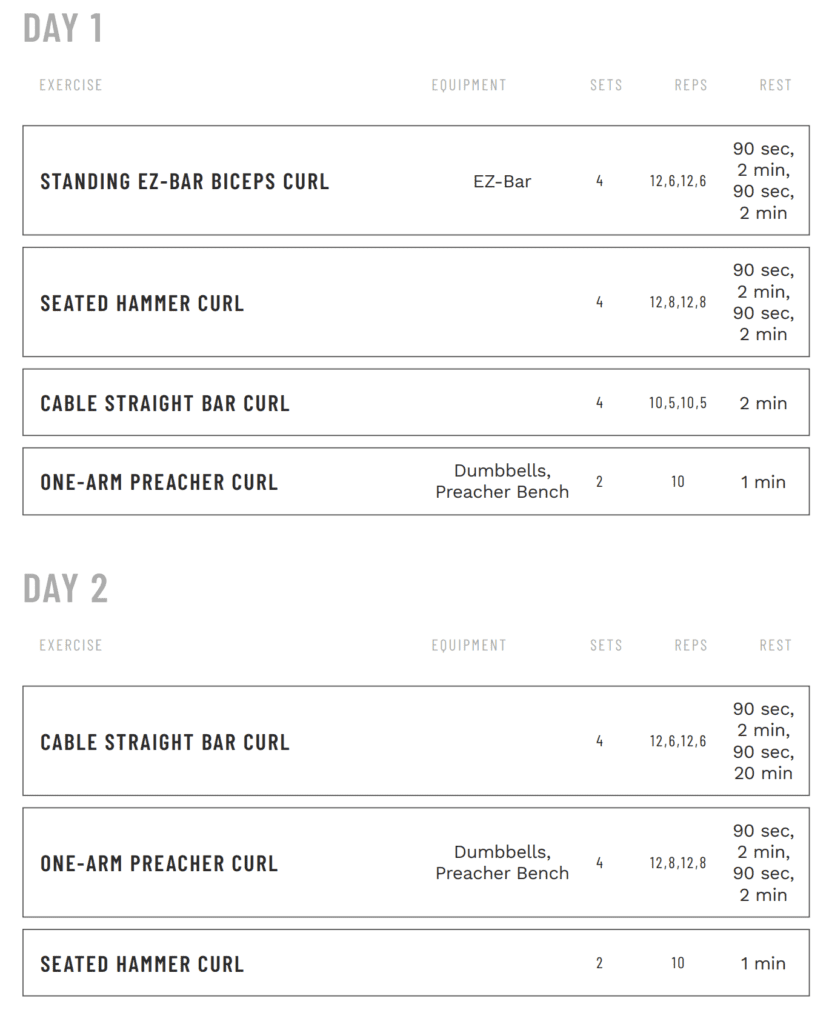
In all reality, you would not be able to build big musclesin 2-days that can last, however, if you are looking to pump your guns for a show or event, you could follow the workout as below:
